 MBLogic
for an open world in automation
MBLogic
for an open world in automation
HMI
Creating HMI Pages
HMIBuilder
Pick the Input Files
Start the HMIBuilder program. Then, open the drawing we have just created and the HMI configuration we have just created.

Select Options
Now, select the options. These consist of which drawing layers we wish to use with menus, and which alarm and event "zones" we wish to monitor.
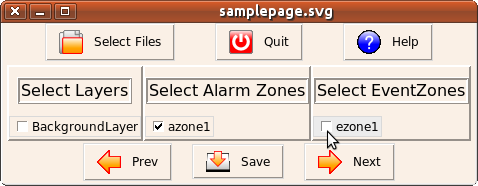
We did not use any menu layers in this simple example, so we will ignore that option. We will however check all the available alarm and event "zones" (there should be one of each in this example).
Click the "next" button when you have completed this step.
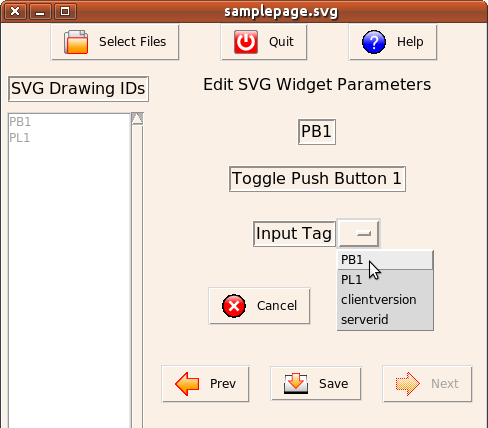
Configure the Widgets
The next step is to configure the widgets. This will set the parameters for each widget according to what you require for the application. All the widgets which you added to the drawing are listed down the left side of the window (the names are the IDs that you assigned).

When you select a widget, a menu will appear which is associated with that widget. Here we will set the push button parameters. Click on "ok" to save the changes for that widget.
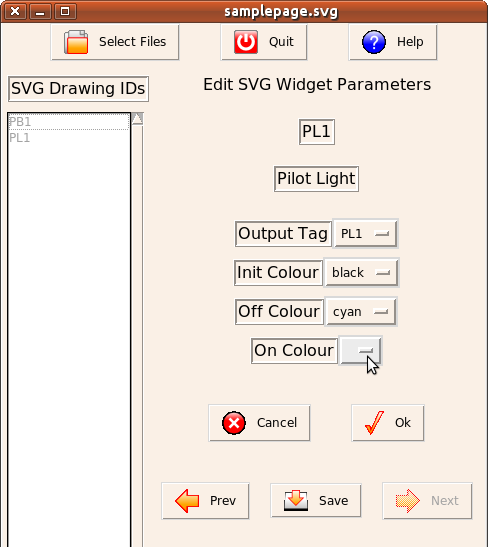
And, we repeat the same for the pilot light.
Save the Edits
Save the changes by clicking on the "save" button below the widget menu area. This will save the current configuration in the SVG drawing file. This will allow us to edit the file again later without having to repeat all the configuration steps from the beginning.
Assemble the Web Page
The finished HMI web page is created by combining the SVG drawing with a template XHTML file which contains the standard boilerplate for the complete page. A web page template file was provided with HMIBuilder. You can create your own web templates to provide a customised look if you desire. We will use the standard template for this example.
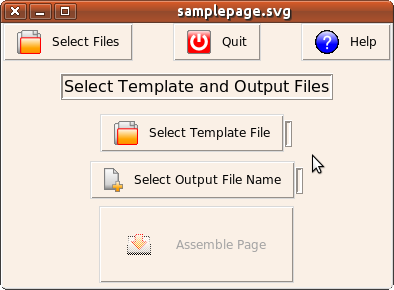
You need to select the web page template, and also an output file name. The web page template will not be altered by this step. The output file name will be the new web page file which will be created. If you select an existing file name, that file will be over-written.
When you have selected the template file and the output file name, click on the "assemble page" button. The new web page will be created.
We have now created the HMI web page. You can exit HMIBuilder by clicking on the "exit" button.